Resistance Band Upright-Row
Compound exercise, Free weightsOverview

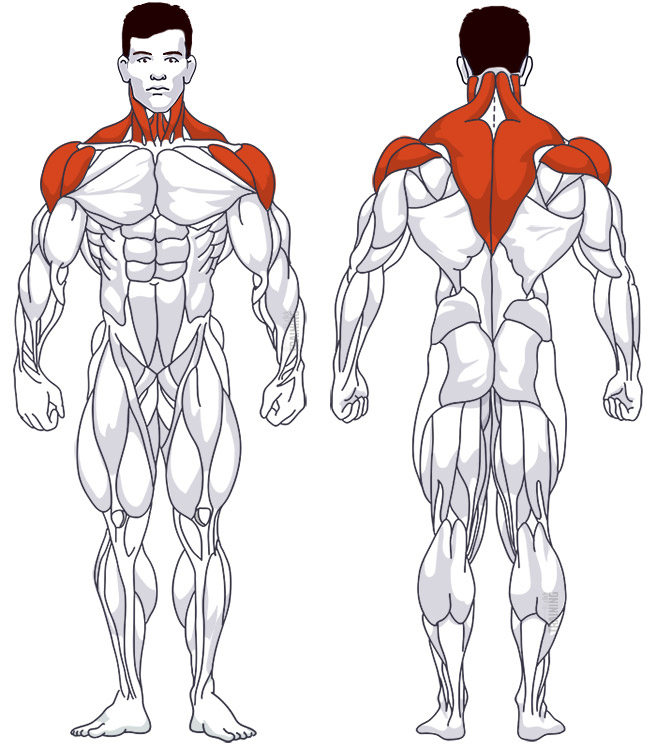
Main muscles
- Neck: Trapezius muscle
(Musculus trapezius) - Shoulder: Medial deltoid muscle
(Musculus deltoideus, Pars acromialis)
Training plans
Resistance Band Upright-Row is a suitable substitute for similar exercises in Neck training or as a supplement to various training plans.
Resistance Band Upright-Row: Basics and alternatives

Involved main muscle groups:
Resistance Band Upright-Row
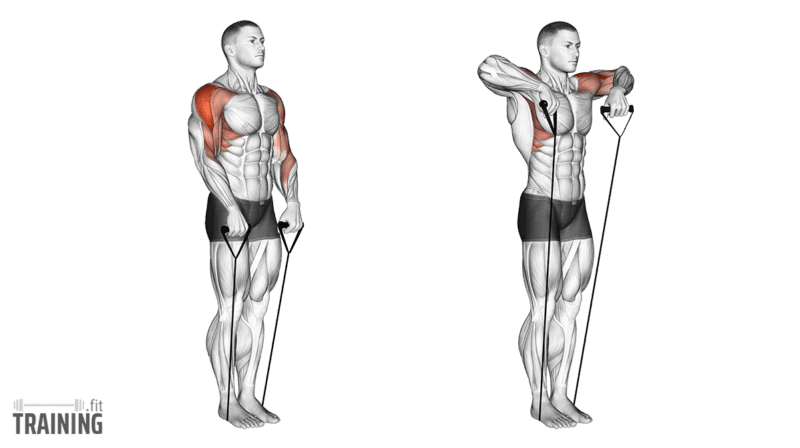
The resistance band upright row is a variation of the standard barbell or dumbbell exercise. You can also use the resistance band to work your trapezius muscle (neck) and shoulders by performing upright rows. In this exercise, you’ll pull the fitness band with both arms up to chin height.
Since the resistance band is flexible, your hands have more freedom during the exercise, reducing the strain on your wrists compared to the barbell version. However, you’ll need to perform the rowing movement more consciously and evenly, doing extra stabilization work.
If you have a dominant right or left side, try doing the exercise in front of a mirror to ensure you’re performing it evenly.
Correct execution
Although the exercise looks simple, mastering upright rowing isn’t easy. As it involves multiple muscle groups (neck and shoulders), this compound exercise requires more attention than comparable isolation exercises (e.g., resistance band shrugs).
Just as with upright barbell rowing, the distance between your hands determines the exercise’s intensity. If your hands are closer together, your neck muscles will be more focused. Widening the distance between your hands puts more emphasis on the shoulders, especially the middle deltoid.
You can adjust the exercise resistance by changing your foot position. A wide stance provides greater resistance than having your feet closer together. More experienced athletes can also change the distance between their feet during a set to gradually reduce the resistance and maintain even muscle tension.
Video tutorial
Step-by-step instructions
Stand hip-width apart.
Place the resistance band centered under both feet.
While holding the two ends securely with your hands, pull the resistance band up on both sides at waist level. Your hands aren’t next to your hips but in front of your body, with palms facing you.
Keep your back straight, head neutrally forward, and chest out.
Now, bring your hands up close to your body in a controlled manner.
Pull your hands up so they almost touch your chin. Your elbows should be higher than your wrists at all times.
At the end of the movement, lower your hands in a controlled manner and start a new repetition.
Common mistakes
Make sure you have a firm footing so the resistance band doesn’t slip out from under your feet. If that happens, the band can snap back and hit you in the face. Training barefoot allows you to feel the position of the band better, but it might cut uncomfortably and irritate the soles of your feet. Training with shoes is more comfortable, but the position of the resistance band is less noticeable. It’s best to try both to find your preferred option.
As always, perform the entire motion sequence in a controlled manner. When lowering your arms, don’t just let them fall due to the band’s pull; bring them down with as much control as you lifted them.