Resistance Band Kickbacks
Isolation exercise, Free weightsOverview
Main muscles
- Triceps: Three-headed arm muscle
(Musculus triceps brachii)
Training plans
Resistance Band Kickbacks is a suitable substitute for similar exercises in or as a supplement to various training plans.
Resistance Band Kickbacks: Basics and alternatives
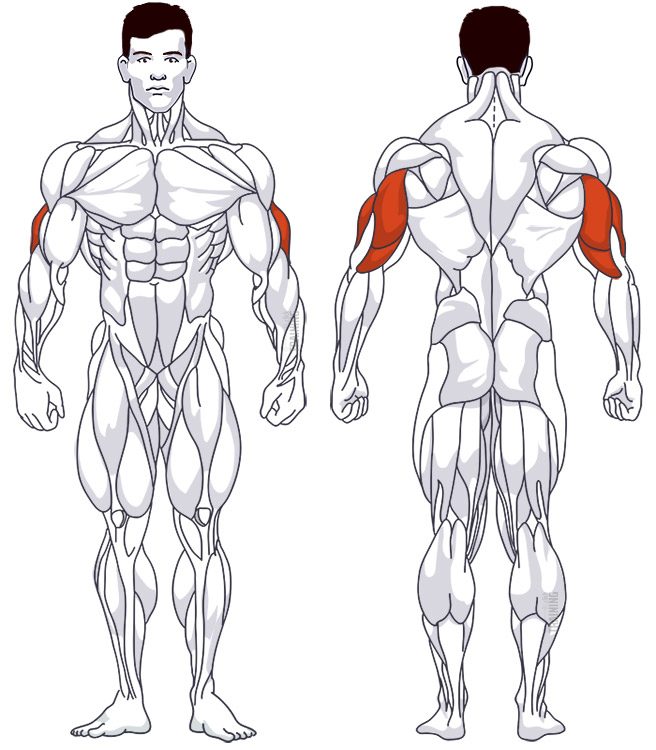
Involved main muscle groups:
Resistance Band Kickbacks
Resistance band kickbacks are a fantastic alternative to dumbbell and cable workouts for home training. The movement stays basically the same: With your upper body bent forward, you extend your arms to isolate and train the triceps.
Alternative exercises include the two mentioned variations with dumbbells or on the cable pulley.
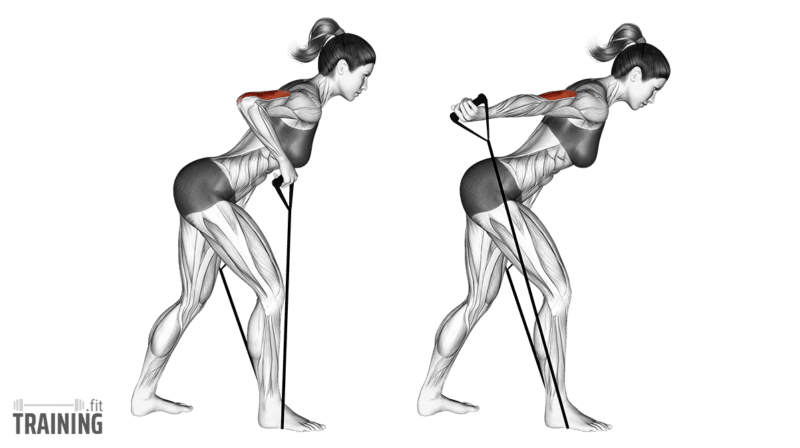
Correct execution
You can perform kickbacks with the resistance band in many different ways. They mainly differ in the positioning and attachment of the band. Here’s how you can perform the bodyweight-only exercise without relying on an external mount.
There are also two ways to train this way: You can extend both arms backward simultaneously, or you can alternate the exercise and train the arms one at a time. Extending both arms together is usually perceived as more intense.
Below, we describe the one-armed version, while the video shows the two-armed version.
Video tutorial
Step-by-step instructions
Hold both ends of the resistance band in your hands. Stand up straight, about shoulder-width apart.
To exercise the right arm, take a half step forward with your right leg and step onto the band with your right foot. For the left arm, do the same with the left leg and foot.
You can adjust the band’s tension-free length according to your desired training intensity. If you want more resistance, tighten the band further in your left hand, so it’s shorter on the right. If the band becomes too long on the left side, you can stand on the band with your left foot as well. In that case, keep the foot in the rear position for better stabilization of your body and the band.
Now, bend your upper body forward at the hips.
Lift your upper arm at the shoulder, so it’s roughly parallel to the floor. Your elbow should still be bent at this point.
Extend your arm at the elbow and guide the band backward against the resistance. At the end of the movement, your arm is fully extended.
Bend your arm in a controlled manner, returning it to the starting position. Repeat this process until your set is finished.
Common mistakes and injuries
Whether you’re standing on the resistance band or mounting it somewhere, make sure it’s secured properly. You definitely don’t want the band to snap into your face or any other part of your body during your workout due to insecure attachment.
Also, pay attention to the proper posture of your back. It should be straight throughout the exercise. Don’t arch it.
The movement of the band should come exclusively from the elbow. When you’re in the starting position, your shoulder should remain still. Make sure to consciously isolate and move the band with your triceps.