Inverted Row
Compound exercise, Body weightOverview

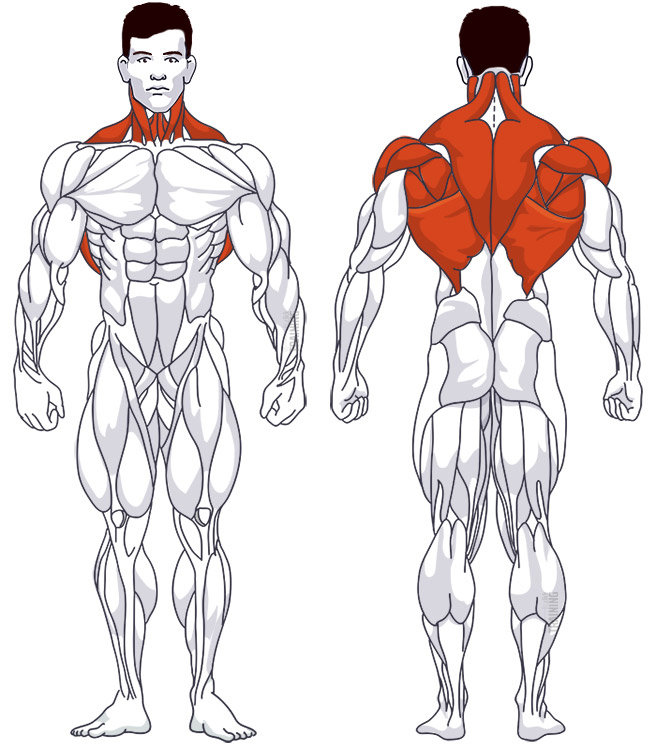
Main muscles
- Neck: Trapezius muscle
(Musculus trapezius) - Back: Large round muscle
(Musculus teres major) - Back: Large back muscle
(Musculus latissimus dorsi) - Back: Larger rhomboid muscle
(Musculus rhomboideus major) - Back: Small round muscle
(Musculus teres minor) - Shoulder: Posterior deltoid muscle
(Musculus deltoideus, posterior deltoid muscle)
Inverted Row: Basics and alternatives

Involved main muscle groups:
Inverted Row
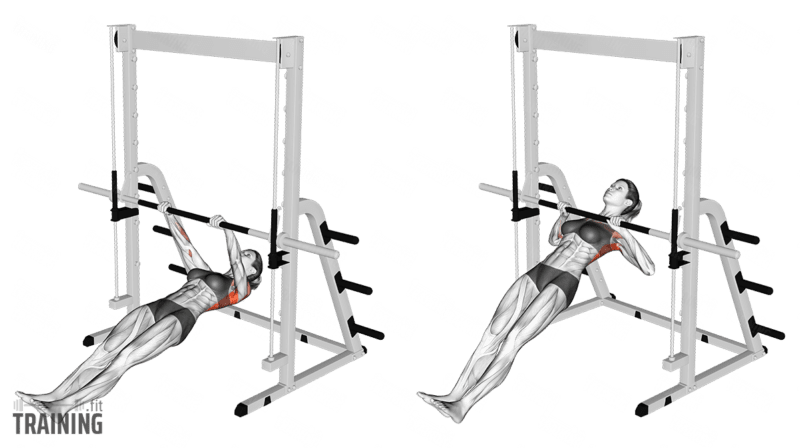
As the name implies, inverted rowing is a reverse version of the popular back exercise. The difference is that you’re not moving the weight on the barbell, but your body: You hang with your back facing the ground on a barbell and lift your body up. Inverted rowing works best in a power rack or a multi-press.
This exercise is suitable for both beginners and advanced athletes, although the goal varies: Beginners can use the exercise to stimulate growth in the upper back, while advanced athletes may use inverted rowing for additional volume or warm-up.
Besides the barbell variation, you can also try other rowing exercises as alternatives, such as single-arm rows, cable rows, or machine rows. Additionally, pull-ups are a fantastic bodyweight exercise for training the upper back.
Correct Execution
You can perform inverted rowing with different foot positions:
- By placing your feet closer to the barbell on the ground and pushing your head further above the barbell, the muscle focus is more on the lats and lower chest.
- If you place your feet further away from the barbell and your head is almost under the bar, the muscle focus is more on the neck and upper chest. With this variation, the range of motion may be reduced. That’s not an issue. Only perform the movement as far as you can without discomfort or pain.
Depending on your training level, you can also vary the difficulty of the exercise.
- Beginners can bend their knees to reduce the weight they need to move (see video at minute 6:05).
- Advanced athletes can place their feet on a weight bench instead of the ground. This changes the center of gravity and the difficulty. A barbell plate can also be placed on the chest, but this is only recommended if you’ve already mastered the exercise without additional weight.
Barbell height: Lie flat on your back under the barbell and stretch your arms straight up. You should be able to reach the bar with minimal stretching effort. If you grab the bar with both hands and tighten your shoulder blades, your upper body should lift slightly off the ground, so you’re hovering just above the ground.
Video tutorial
Step-by-step instructions
Set the barbell at the appropriate height (see above).
Lie flat on your back below the barbell. The barbell should be at about chest height. Depending on your preferred muscle focus, you can change this position (see above).
Grab the bar with a grip slightly wider than shoulder width with both hands.
Tighten your shoulder blades and lift your upper body off the ground. Keep your back straight. You’re now in the starting position.
Pull your chest up towards the barbell by bending your arms. This primarily activates the upper back. Perform the movement as far as you can without causing discomfort. Some people touch the bar with their chest, while others maintain a distance between their body and the barbell. Hold the position for a brief moment and then lower your upper body back to the starting position in a controlled manner.
Common mistakes
Focus on lifting your chest up towards the barbell. Avoid using your hips as the initiator of this upward movement. This can distort the movement and reduce the training stimulus.
Also, keep your back straight throughout the exercise. Don’t round your back, but maintain tension throughout the entire training.