Kneeling Battling Ropes
Compound exercise, Free weightsThis article is verified by 3 studies/publications.
Overview
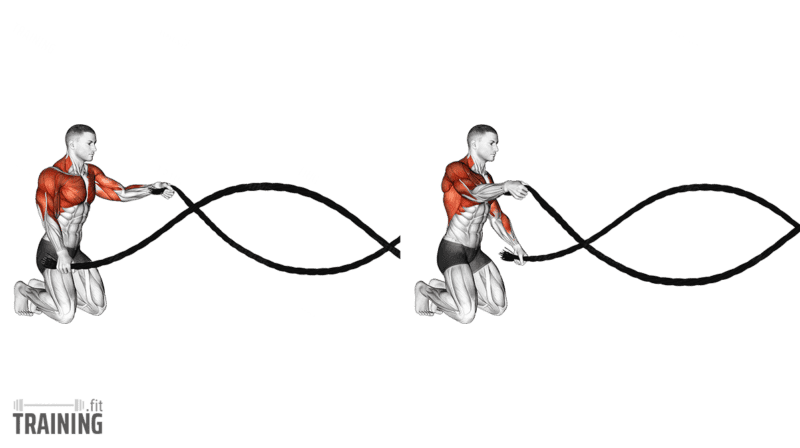
Main muscles
- Shoulder: Anterior deltoid muscle
(Musculus deltoideus, Pars clavicularis) - Shoulder: Posterior deltoid muscle
(Musculus deltoideus, posterior deltoid muscle) - Biceps: Arm flexor
(Musculus biceps brachii) - Triceps: Three-headed arm muscle
(Musculus triceps brachii) - Abdomen: Transverse abdominal muscle
(Musculus transversus abdominis) - Abdomen: External oblique abdominal muscle
(Musculus obliquus externus abdominis)
Training plans
Kneeling Battling Ropes is a suitable substitute for similar exercises in Conditioning and full-body or as a supplement to various training plans.
Kneeling Battling Ropes: Basics and alternatives
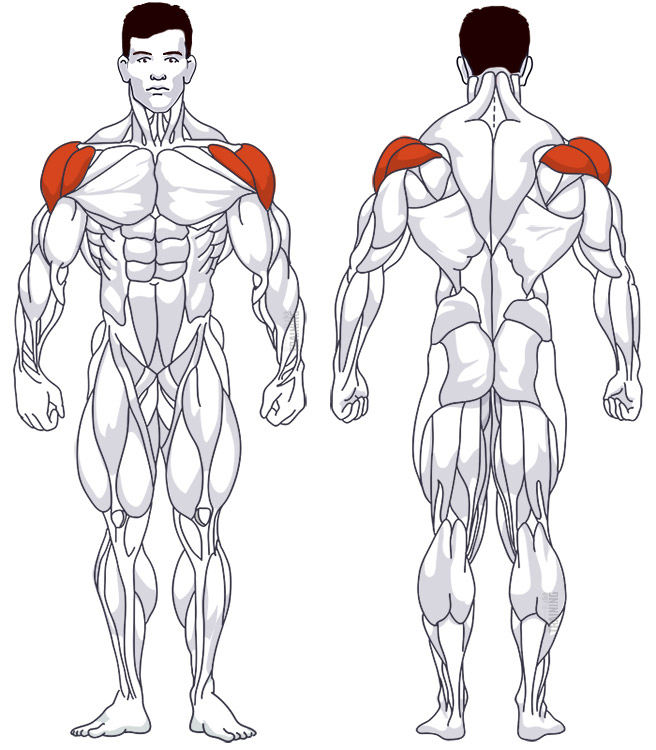
Involved main muscle groups:
Kneeling Battling Ropes
Kneeling battle ropes bring the alternating rhythm of Battling Ropes to a tall-kneeling position. You’ll raise one rope end as you lower the other. Your shoulders and arms create the waves while your abs and hip muscles steady your upper body and pelvis.
Stay on both knees throughout; standing up repeatedly is a separate variation, as are squat-stance or jumping versions. Battle-rope flys use a standing position and horizontal arm waves.
Correct execution
Anchor the rope securely and put a comfortable, stable pad under both knees. Kneel facing the anchor with your knees about hip-width apart and your hips stacked over your knees, and leave enough room beside your thighs for your hands to pass.
Hold a rope end in each hand and adjust your distance so the ropes have enough slack to move. Start with small vertical waves, raising and lowering your hands alternately. Keep your upper body upright and your head level as you look along the ropes, and breathe steadily while your hands keep the rhythm. If the waves pull you forward or make you bend at the hips, make them smaller and reset. Finish by slowing the arm movements until the ropes settle, then put the ends down before standing.
Kneel with both knees on even padding and your lower legs comfortably supported behind you, since an uneven or sliding pad makes it harder to keep your pelvis centered. If the rope catches the edge of the pad, stop and clear its path. The waves come from your arms, so don’t push through your toes and rock your whole body forward.
Video tutorial
Step-by-step instructions
Check the anchor and kneel on a stable pad facing the rope attachment.
Set both knees about hip-width apart and bring your hips above them.
Grip both rope ends with room for your hands beside your thighs and some slack in the ropes.
Raise one hand while lowering the other, then alternate in a continuous rhythm.
Keep your hips over your knees and your trunk controlled while breathing normally.
Let the waves become smaller, place the rope ends down and stand only after they stop.
Common mistakes
Sitting back onto your heels takes you out of the tall-kneeling position. If you can’t maintain it, stop and reset instead of repeatedly dropping your hips with every wave.
If you lean back, your upper body starts moving along with your arms. Make the waves smaller so you can stay upright. And if you need to move closer, don’t shuffle forward on your knees while the ropes are still pulling: stop first, then move the pad and your body together.
What the science says
There doesn’t seem to be a study on battle ropes in a kneeling position. The research below looked at standing or seated rope waves and at rope training in general, which shows what the ropes ask of your upper body, heart and lungs, although the measured values may be different in a kneeling position.
In a 2015 study, 21 volunteers performed standing rope waves, either alternating, as in standing battle ropes, or with both arms together. The front shoulders, outer obliques and lower back muscles worked at 51–73% of their maximum, while the side glute muscle stayed at 14–18%. Alternating waves produced greater oblique activity, whereas moving both arms together produced more lower back activity. This shows how hard the muscles work in a single session, not how much they grow.[1]
A 2018 study with 40 healthy adults tested a rope workout of 10 rounds of 15 seconds, each followed by 45 seconds of rest, done either seated or standing. The seated group reached a peak oxygen uptake of about 72% of the maximum from a cycling test, and the standing group about 68% of their treadmill maximum. Each participant tried only 1 position, so the study didn’t compare the 2 directly. The authors suggest ropes as an option for people who can’t use their legs for rhythmic aerobic exercise.[2]
A 2026 review pooled 21 controlled studies with 590 mostly male participants aged 11–25. Compared with control groups, battle rope training improved upper-body power, grip strength, upper-body muscular endurance and core endurance, while its effect on leg power was unclear. The studies tested different rope-training programs and produced widely varying results.[3]
Sources
- Muscle Activity During Unilateral vs. Bilateral Battle Rope Exercises. Calatayud J, Martin F, Colado JC, Benítez JC, Jakobsen MD, Andersen LL. Journal of Strength and Conditioning Research. 2015;29(10):2854–2859. doi: 10.1519/jsc.0000000000000963.
- Metabolic Responses to a Battling Rope Protocol Performed in the Seated or Stance Positions. Brewer W, Kovacs R, Hogan K, Felder D, Mitchell H. Journal of Strength and Conditioning Research. 2018;32(12):3319–3325. doi: 10.1519/jsc.0000000000002903.
- Effects of battle rope training on sporting performance: a systematic review and meta-analysis. Cao Y, Luo Y, Nazarudin MN, Koh D, Li S, Chen P. BMC Sports Science, Medicine and Rehabilitation. 2026;18(1):431. doi: 10.1186/s13102-026-01970-9.