Corkscrew Push-Ups
Compound exercise, Body weightOverview
Main muscles
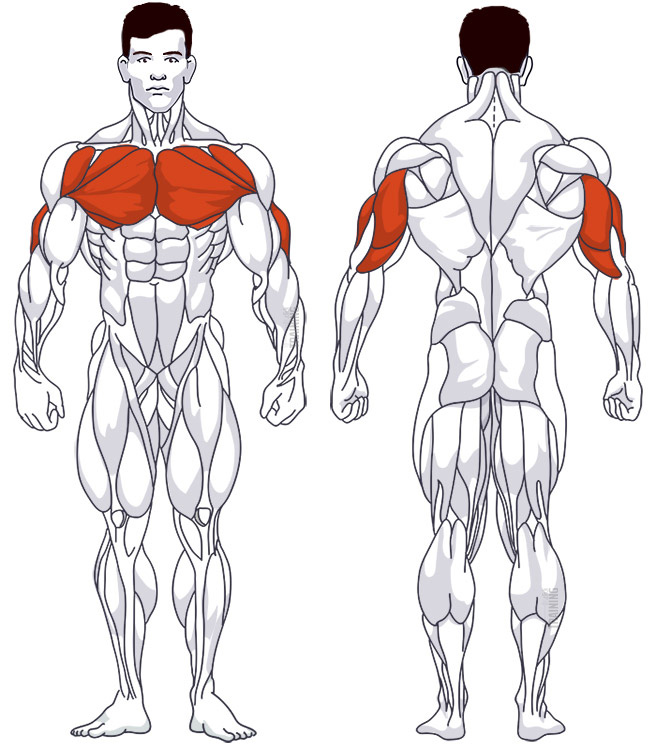
- Chest: Large pectoral muscle
(Musculus pectoralis major) - Shoulder: Anterior deltoid muscle
(Musculus deltoideus, Pars clavicularis) - Triceps: Three-headed arm muscle
(Musculus triceps brachii)
Training plans
Corkscrew Push-Ups is a suitable substitute for similar exercises in Chest training or as a supplement to various training plans.
Corkscrew Push-Ups: Basics and alternatives
Involved main muscle groups:
Corkscrew Push-Ups
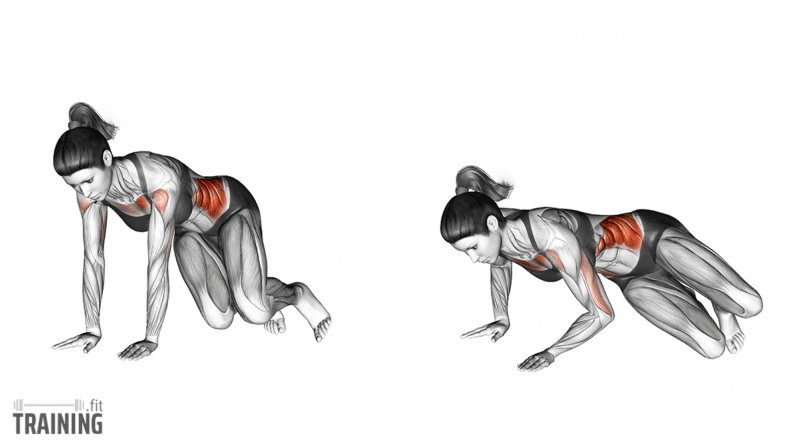
Corkscrew push-ups add a demanding side-to-side turn to the classic push-up. You’ll start with your feet closer to your hands and both knees bent. As you lower one shoulder toward the floor, your hips and knees turn with your upper body. Your chest, shoulders and triceps do the pressing, while your core helps control the turn.
Get comfortable with regular push-ups before trying this variation. Grasshopper Push-Ups also involve a turn, but there you keep one leg extended while the other knee moves across your body. In corkscrew push-ups, both knees stay bent the whole time.
Correct execution
The twist starts from a compact position with your knees hovering above the floor. A small turn is enough to learn the pattern before you try a larger movement.
Place your hands about shoulder-width apart, then walk your feet toward them and bend your knees. Keep your knees just off the floor and your hips slightly raised. Leave enough room so your knees don’t hit your elbows as you turn; if it feels cramped, move your feet back a little.
Lower one shoulder toward the hand beneath it, letting your hips and knees follow the turn. Press up a little as you move through the middle, then lower the other shoulder toward the hand beneath it. After the second side, press all the way back to the raised starting position.
Keep both palms firmly on the floor so both arms support the movement. Let your toes adjust as you turn rather than twisting against fixed feet, and keep your knees off the floor. Start with a small turn and make it bigger only as long as the movement stays smooth.
You don’t need to skim your chest along the floor between sides. Rise enough to change direction with control. If pressing back from one side is harder, use a shallower depth on both sides.
Video tutorial
Step-by-step instructions
Start on your hands and toes with your hands beneath or just outside your shoulders.
Walk your feet toward your hands and bend your knees, keeping them off the floor.
Bend your elbows and lower one shoulder toward the hand beneath it, letting your hips and knees turn with the movement.
Press up a little and move through the middle with control.
Lower the other shoulder toward the hand beneath it, letting your legs follow the turn. Press back into the raised bent-knee starting position before repeating.
Common mistakes
A fast, exaggerated twist makes it harder to support yourself on your hands. Keep the turn small at first and move smoothly through the middle instead of dropping from one side to the other.
Avoid resting your knees on the floor halfway through and twisting around them. If you need a break, return to the starting position first and then lower your knees. And only go as deep as you can while still pressing back up with control.