Front Plank
Compound exercise, Body weightThis article is verified by 4 studies/publications.
Overview
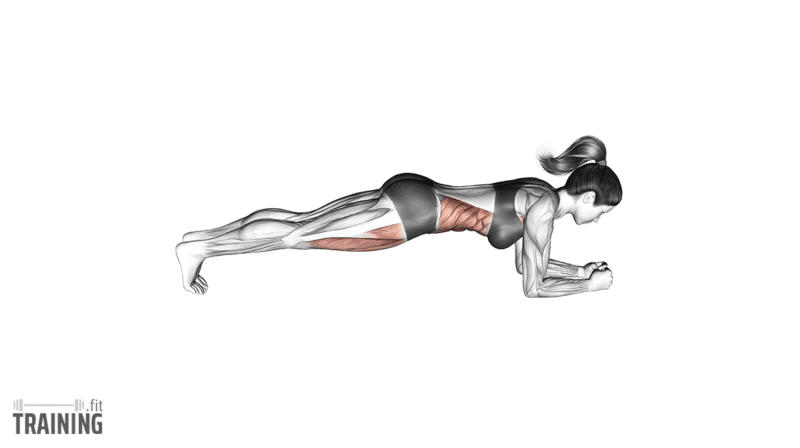
Main muscles
- Abdomen: Straight abdominal muscle
(Musculus rectus abdominis) - Abdomen: External oblique abdominal muscle
(Musculus obliquus externus abdominis) - Abdomen: Transverse abdominal muscle
(Musculus transversus abdominis)
Training plans
Here you can find example plans for front plank training:
Front Plank: Basics and alternatives
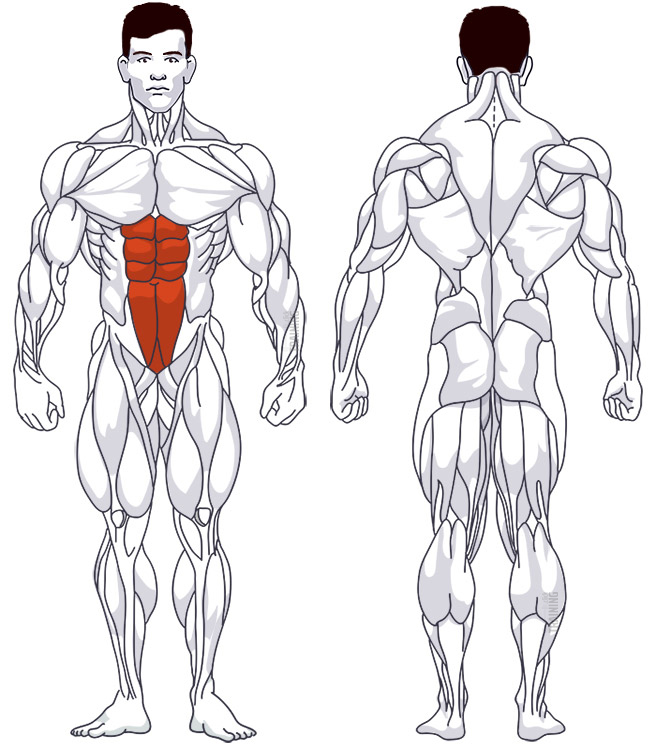
Involved main muscle groups:
Front Plank
The front plank is a classic abs exercise: you’ll hold your body above the floor on your forearms and toes. Your abs steady your trunk, while your shoulders and legs help support the position.
A side plank shifts the support onto one side of your body. With a dead bug, you lie on your back and practice keeping your trunk steady while moving your legs. For the front plank, choose a hold time you can maintain while breathing evenly.
Correct execution
The plank is a hold, so the quality of your position matters more than adding movement. You should be able to keep your trunk steady while continuing to breathe.
Place your elbows beneath your shoulders and rest your forearms on the floor. Your hands can stay apart or lightly together, whichever feels comfortable. On a hard floor, a thin, firm pad under your forearms is more comfortable. Just make sure the pad and the surface under your feet don’t slip.
Extend your legs and start with your feet about hip-width apart. Tighten your abs and butt, then lift your body into a roughly straight line from shoulders to heels. You can bring your feet closer together to narrow the support, but you don’t need to join them for a correct plank.
Look toward the floor and press your forearms down to keep your chest supported. Don’t shrug. For the standard plank, keep your shoulder blades in a neutral position; pulling them together while tilting your pelvis backward makes the hold harder for your core, so treat that as a more demanding variation. Your hips stay in line with the rest of your body, neither sagging toward the floor nor sticking up. It helps to check your position from the side.
If it’s too hard to hold, rest your knees on the floor and keep a straight line from your shoulders to your knees. End the hold when you can’t keep your position and breathe steadily anymore, then lower your knees and body with control before you relax.
Video tutorial
Step-by-step instructions
Lie facing the floor and position your elbows directly below your shoulders.
Rest your forearms comfortably and extend your legs with your toes on the floor.
Tighten your abs and lift your hips and upper body into a roughly straight line.
Keep your head in line with your back, your hips steady and your breathing regular.
Hold only as long as you can keep that position; rest your knees on the floor if you need to.
Lower your knees and body gently to finish before releasing the tension.
Common mistakes
Letting your hips sag increases the arch in your lower back. Start again or use the version with your knees down. Lifting your hips high also changes the position you’re trying to hold.
Pushing your head forward is another typical mistake, so keep it in line with your upper body. Breathe evenly, and end the hold once you can only keep going by holding your breath or letting your position slip.
If you unintentionally rock forward onto your elbows and back toward your toes, check your foot position. Settle into a steady hold with pressure through both your forearms and feet.
What the science says
Most research on planks examines how small technique changes affect core muscle activity. These studies look at single sessions, so they show how hard the muscles work, not which version makes your core stronger over time.
In a 2020 study with 20 young adults, drawing the belly button in toward the spine during the plank (abdominal hollowing) increased the activity of the obliques and the lower back muscles. Participants found the plank harder, although activity in the rectus abdominis, your six-pack muscle, didn’t change significantly.[1]
Planks on unstable equipment, such as a stability ball or a suspension trainer, increased the activity of the outer core muscles compared with a regular plank in 12 young adults. The authors regard these as advanced variations. Since they also increase lower back muscle activity, the authors advise caution for anyone with a weak or injured lower back.[2]
A separate study tested shoulder blade and pelvic positions in 15 participants. Pulling your shoulder blades together while tilting your pelvis backward led to the highest activity in most of the measured core muscles, and it also felt the hardest.[3]
Plank endurance has also been studied in relation to injury risk. In 75 college cross-country and track-and-field athletes, how long they could hold a front or side plank before the season wasn’t linked to overuse injuries during the season. Plank hold time alone therefore tells you little about injury risk.[4]
Sources
- Influence of Abdominal Hollowing Maneuver on the Core Musculature Activation during the Prone Plank Exercise. García-Jaén M, Cortell-Tormo JM, Hernández-Sánchez S, Tortosa-Martínez J. International Journal of Environmental Research and Public Health. 2020;17(20):7410. doi: 10.3390/ijerph17207410.
- Electromyographical Comparison of Plank Variations Performed With and Without Instability Devices. Snarr RL, Esco MR. Journal of Strength and Conditioning Research. 2014;28(11):3298–3305. doi: 10.1519/jsc.0000000000000521.
- Influence of Scapular Position on the Core Musculature Activation in the Prone Plank Exercise. Cortell-Tormo JM, García-Jaén M, Chulvi-Medrano I, Hernández-Sánchez S, Lucas-Cuevas ÁG, Tortosa-Martínez J. Journal of Strength and Conditioning Research. 2017;31(8):2255–2262. doi: 10.1519/jsc.0000000000001689.
- Plank Times and Lower Extremity Overuse Injury in Collegiate Track-and-Field and Cross Country Athletes. Luedke LE, Rauh MJ. Sports. 2022;10(3):45. doi: 10.3390/sports10030045.